About...
Grab This Blog's Widget! < Amarettogirl
visual artist and writer marisol diaz

i am a self-defined Nuyorican creative (that is a Puerto Rican who is from both the isles of Manhattan, NYC and the Caribbean). I share daily in the joy of education and live in a cute port town in New York, in a 'teensy-weensy' apartment with my two dogs and canary named Valentino. Check out my Etsy shop for purchasable pieces. Please do not reproduce imagery off of this site without explicit credit and no derivatives may be made of my original imagery- Thank You.

Creative Commons License
This work by marisol diaz is licensed under a Creative Commons Attribution-NoDerivs 3.0 Unported License.
Add to Technorati Favorites
pingg Invites & eCards
bloglovin
Sunday2.1.jpg
MondayArtdayButton.jpg
amarettogirl. Get yours at bighugelabs.com/flickr
3ww1.jpg
pingg Invites & eCards
Grab This Blog's Widget! < Amarettogirl
CRAFT: I'm a Crafter!
The Small Is Beautiful Manifesto

Entries in Tutorials (15)

Sunday
Apr122009

Making a Marie Antoinette Cupcake Display Doll 

Unfinished Cupcake Display Doll

The last time I had a craft fair for my Mai Sweet Shop, I really wanted to make a Marie Antoinette Display doll to house my cupcake carousel and never found the time. A while back when I was browsing through cyberspace, I saw a gorgeous old porcelain display doll and I never forgot it. I went to A.C. Moore and bought a generic plastic doll. I plucked her legs off (sorry legs). Using a Dremel I cut the pelvic area off and drilled holes along the bottom edge of the torso.

I drilled holes with a Dremel I used strong wire and pipe cleaners to make the cage There will only be cupcakes in the open cage...the bird is free Unfinished Doll This is the face the doll came with that I plan to alterpattern for satin skirt The fabric and color palette for her dress Buttons that show the dress color palette Stay tuned to see how she turns out. I think she would make an excellent table centerpiece too - maybe you can make your own! Let me know if you do!

Monday
Apr062009

Drawing With Light

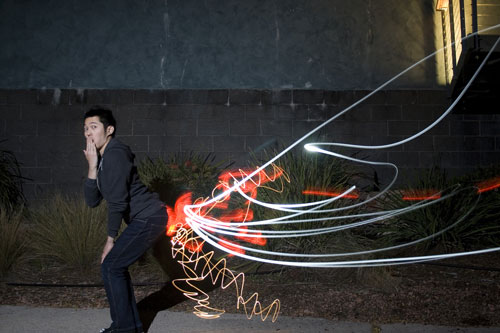
So I was going through some pics from this past summer and I found these silly abstracted photos from when I was playing with drawing with night light:

path by marisol diaz hearts by marisol diaz circles by marisol diaz

In the popular world of drawing with light my pics are definitely little itty bitty babies!!!! To see some AWESOME, sophisticated, funny and flat-out spectacular drawings with light images (and EVEN get in on the action with awesome INSTRUCTIONS check out this site- BOOM!) Boom is a site made by genius designer Jeff Hamada in hopes to foster a community of creators. He asked for submissions of light drawings and boy did he get them!

Light Drawing submitted to Boom by Brett Peacock & friends | http://www.soap.com.au/
Sunday
Mar292009

Amarettogirl Craft Book Review- The Naughty Secretary Club: The Working Girls Guide to Handmade Jewelry by Jennifer Perkins

Since I'm big on reinventing the function of small plastic toys into jewelry (such as my Mai Sweet Shop Altered Rement line) I was beaming with intrigue when I saw the new book by Jennifer Perkins (yes the DIY network's Craft Lab host herself!) has a new book with her trademark kitschy style, entitled The Naughty Secretary Club: The Working Girls Guide to Handmade Jewelry.

One day, in a hurried rush I browsed through the book in the bookstore, but I was too tired from a hard days work (teaching is not easy) and I didn't immediately purchase it. Then my fave Threadbanger podcasts had a Naughty Secretary Resin Bracelet demo on their weekly show with Jennifer Perkins and her book. The demo was so informative and thorough that the second I got on Spring Break I went back and bought the book. Boy am I glad I did, since a big chunk of my vacation was all about crafting with Jennifer!

The Naughty Secretary Club by Jennifer Perkins
  • Paperback: 144 pages
  • Publisher: North Light Books (August 11, 2008)
  • Language: English
  • ISBN-10: 1600611168
  • ISBN-13: 978-1600611162

So here are some of the many strengths and little weaknesses of the book:

Excellent for beginners and inspiring enough for experienced folk (like me). Jennifer's overall mission is to get creatives and non, to see outside the normal confines of jewelry making and in this -recycle and reuse way- to see potential in anything, and I mean anything.

excerpt from pg. 14 of The Naughty Secretary Club by Jennifer Perkins

So on the negative side, if fun colorful, larger than life kitsch, garden gnomes, telephone cords, swizzle sticks, plastic toys, eyeglass necklaces, pencil earrings and watch headbands are too over the top for your traditionalist-little-beady-jewelry-makin'-mind than this book is not for you.

Ms. Perkins applies a secretary (9-5 gal) theme throughout the book with funny little side-notes, hot-tips and blurbs on the working girls history, holidays and lore. She includes what I think are hysterical, informative tidbits on the art of true, multi-tasking ability, ie., six other uses for coffee filters and a list of eight other uses for pantyhoses!

So in honor of the first day of Spring I tried my hand at an over-the top plastic, fantastic bracelet inspired by Ms. Perkin's Secretary's Bouquet Bracelet on pg. 120. excerpt from The Naughty Secretary Club by Jennifer Perkins I was super lucky to find a cha-cha bracelet blank (yes thats what its called) at A.C. Moore (Michael's didn't have any). However the cha-cha bracelet blank that I found had only one loop running across it, as opposed to the two loops on the blank that Jennifer uses in the book. I'm sure if I would have found the correct blank my Spring Chic bracelet would have come out a lot meatier. Instead I opted for the longer hula-skirt style.
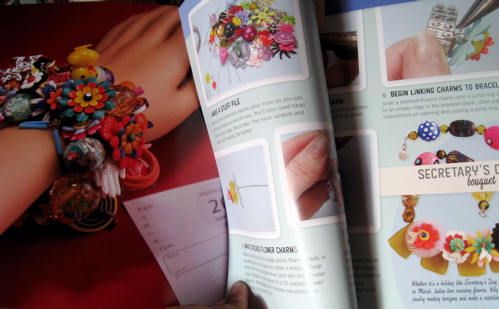
Another great aspect of the book is that is categorizes every project in chapters of difficulty. This bracelet is a three star difficulty (highest level in book). In addition, she explains that this bracelet is great for the collector and Lord knows thats what I am truly master of.
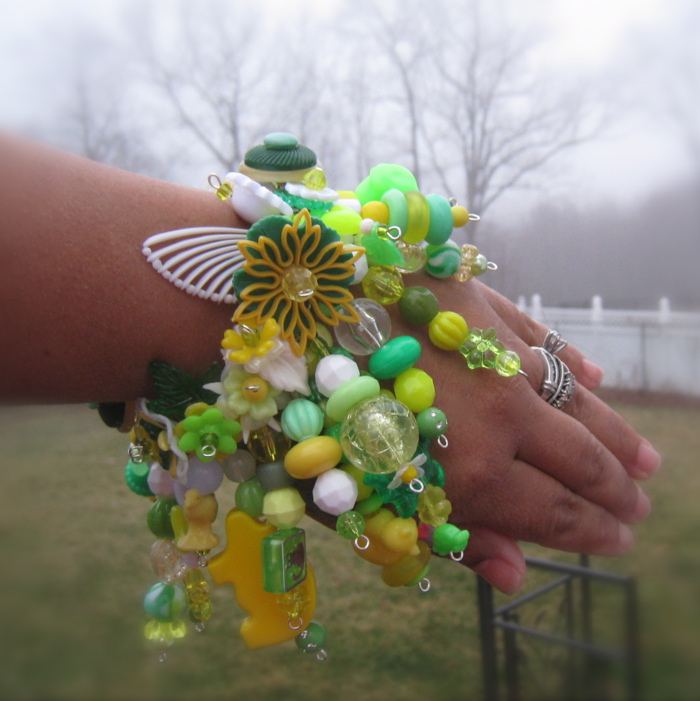
My Spring Chic Bracelet inspired by The Naughty Secretary Club Spring Chic
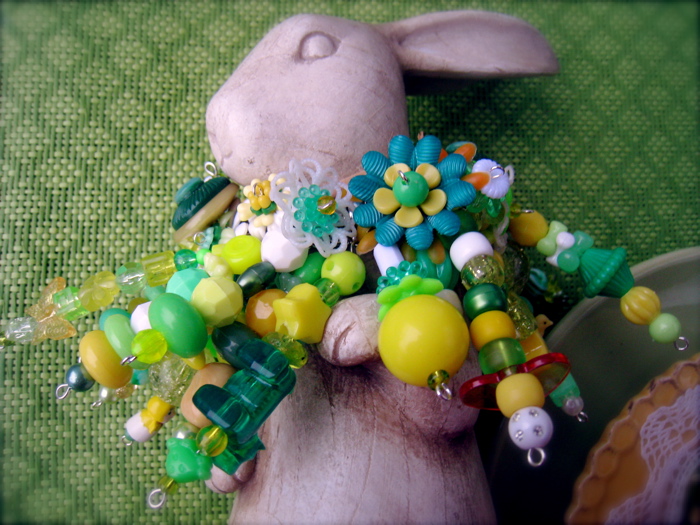
So if you're interested in adorning your body with original, funky, re-cycled, joyful and often whimsical jewelry BUY this book!!

Thursday
Mar192009

Everyday Typography..

sample of a Primitive Country Folk art sign

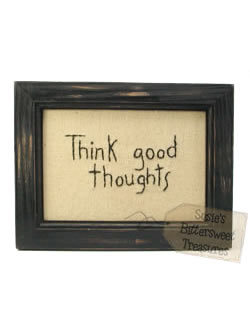
I went up to the North Country this past weekend to visit my in-laws. We even crossed over the border to Cornwall, Canada for an afternoon of consignment/thrift/antique/ (really window) shopping. One thing that shows up in all the country decor and antique shops on the way up North are those "Primitive" (I just learned that is indeed what they're called) country folk art wall quote signs saying things like "I don't repeat gossip, so I'm only going to say this once" or "don't look down on someone unless you're helping them up" or "family is..." you can fill in the blank with any sugary heart-warming thing you like (cuz it all looks good on an antique-treated, wood stained, framed sign).

An embroidered primitive sign from Susie's Bittersweet Treasures

However, I'm partial to the hand-lettered signs as opposed to the computer generated ones that are meant to imitate the hand-lettered look with a cleaner polish. I am also partial to the beautiful hand -embroidered quotes that are sewn on to tea- or coffee stained fabric. As they are meant to be, all of them are very inspirational.

So for today I thought all of us 'creatives' in cyberspace could all use some inspiration and motivation to put our hand and art back into writing. I discovered this 'envelope' (scroll down) in my writing desk (its origins unbeknownst to me) and I thought I would share the images of the writing tools and eloquent instructions that came within the envelope with you.

Instruction #1

A well positioned desk is an invitation to write.
detail of pen nibs

Instruction #2

Dip the nib in the ink-pot and try first on scrap paper: otherwise the first line might be a spot or ink blot. Use a protective sheet to cover the blank part or your sheet as you write. Always write with the full width of the nib.

front of envelope envelope insert

Instruction #3

Do not use pads: use single sheets. To begin the quiet art of beautiful writing, inner calm and concentration are required.
back of envelope

Instruction #4

It might be that at first your hand will not accomplish what you expect. Try again. Eventually you will reach your goal, and, in the process, gain a true feeling of peace.

When finished with your writing thoroughly clean the nib. You are now experiencing the pleasure of writing.

For really wonderful examples of lettering one of my favorite art magazines Somerset Studio has a wonderful section entitled Lively Art of Lettering that you should be sure to check out!

Saturday
Dec132008

Felt Ipod Touch Case! Gift Tutorial!

Complexity Level = SUPER EASY!!My Handmade Ipod Touch Felt Case I received an Ipod touch for my B'day this year from my best friend, my hub. So since I enjoy making custom fur coats for ipods, I thought I would make a case for this device. But this time I decided to use some awesome felt that I bought when I was in Munich, Germany last Spring. And for all of you crafters, I decided to photograph the process and make you all a tutorial so you can make your own felt ipod case!First cut your pieces of felt.Cut the window out by folding the fabricThe windowEmbroider The edges with a decorative edgeFollow the needle to learnPull the needle through the stitchThats the stitch!One More TimePull the needle thru the stitch Last Edging Stitch!Now Edge your Window!Now its time to do the cover!Pick another color to cut out a head The Girl needs hair!Start to stitch the hair down.Embroider a face.Choose a button and sew it on.Now sew on a scarf that wraps around the whole case to close at the button!

Congratulations You're done!!!


Page 1 2